Showing posts with label Tutorials. Show all posts

Wednesday, April 27, 2011

How to Make an Owl Cake Topper

Hello cake friends.  Here is my newest tutorial: How to make an owl cake topper.  Enjoy!


What you will need: 
  • Powdered sugar for rolling out fondant (I use a shaker)

  • Gel food colors

  • rolling pin

  • tylose powder

  • circle cutters

  • small flower cutter

  • tip 12

  • exacto knife

  • fondant (purple, white, black, yellow)

  • small paint brush

  • lollipop stick

  • vodka (not shown)

  • styrofoam block (not shown)


First, push your lollipop stick into the styrofoam block.  Brush a little gum glue (tylose powder mixed with water) onto the stick.  Roll the purple fondant into a cone shape for the body and insert onto the lollipop stick.  Roll a smaller ball of fondant for the head and pinch the ends as shown.  Glue the head onto the body.


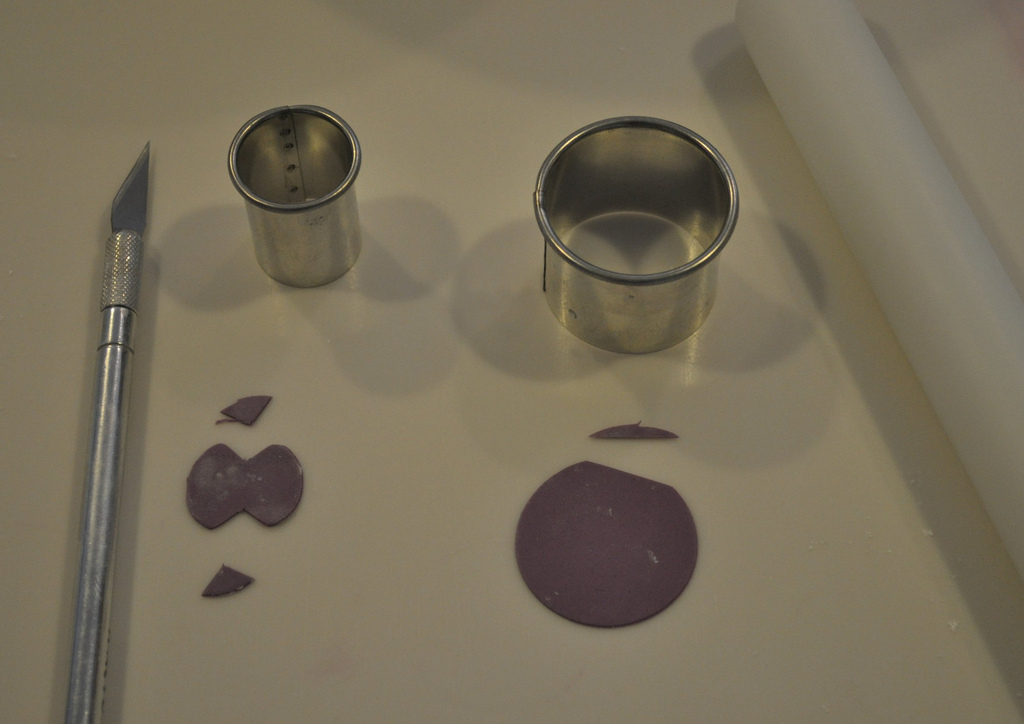
Dust your surface with powdered sugar and roll out more fondant (I used a lighter shade of purple) with a rolling pin.  Use circle cutters and exacto knife to create the face and stomach of the owl.  Glue to owl.


For the feet use a small flower cutter and trim as shown.  Also, form the wings and beak and attach to the owl using gum glue.


For the eyes roll out larger white circles, black circles using a tip 12 and small whites for eyes, and glue to owl using gum glue.


Mix gel food color with a little vodka.  Hand paint the design onto owls stomach.  If you mess up you can erase your mistakes with a Q-tip that has been dipped in vodka.


Our cutie little owl is finished!  I hope I have inspired you.

Wednesday, March 2, 2011

How to Make a Stork Cake Topper


This little guy is a little more time consuming than some of my other toppers, but the extra time spent on him really paid off.  He's just so darn cute!


Start by coloring your fondant with gel colors and knead in a little tylose powder.  Cut out a small green patch of fondant for the stork to stand on and push an 18 gauge wire all the way down into your styrofoam.  This wire will support the entire topper so make sure it is very long (mine went all the way to the bottom of a 4" styrofoam).  Form the legs and feet as shown.  Apply gum glue (a mixture of water and tylose powder) to the wire and insert the first foot and leg. 


Wrap a thin wire (22 gauge) around the base.  Attach the foot using another small wire (22 gauge).  Insert and glue the leg onto the wire and glue the foot to the straight leg's knee.   


Form a small body/neck out of white fondant, wrap another wire around the base and attach the body with a little gum glue.  The new wire should help support the back of the body.  The body needs to be somewhat small so it wont be too heavy for the wires. 


Cut out wings using a leaf cutter and attach to the body with gum glue.  My wings fell to the sides a little which just made it look even better.  Insert/glue another18 gauge wire into the neck.  Allow to dry for a few hours. 


Form the head/neck out of white fondant and glue to the body.  Mark your eye holes with the end of a paint brush and insert/glue another wire into his face for the beak.  Allow to dry overnight. 


Form the beak and glue onto the wire.  Roll tiny black and white balls for the eyes and glue into place.  Form the hat out fondant using a piping tip and bend the extra wire down. 


Cut out the blue baby blanket and form the baby's body.  Most of the baby will be covered so it doesn't have to be perfect.  Just make sure he has 10 toes! Fold up the ends of the blanket and glue onto the wire and allow to dry as shown. 


Add the final details like a bow tie, feathers and eyelashes.  And Ta-Daa! Cute!!

Sunday, November 28, 2010

A Quick and Easy Fondant Sheep

I am all about taking shortcuts and making things easier on myself.  So when I had three sheep to make for a cake I had to figure out a way to make them fast.  Each one took a whole 5 minutes to make.  So so easy!!  These would look adorable on a farm animal cake, or even as a cupcake topper too. 


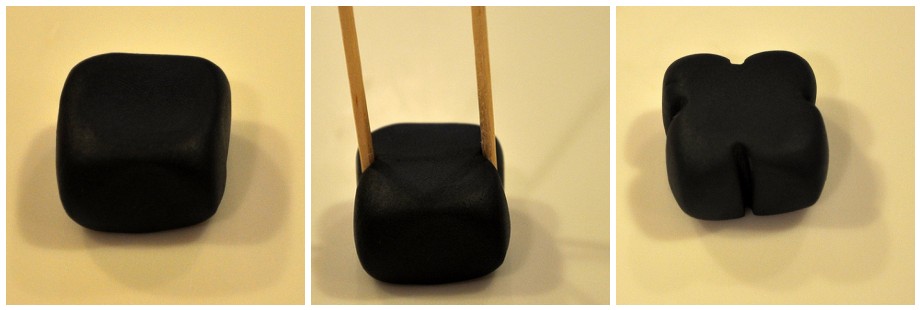
You will need some black and white fondant.  Knead in a little tylose powder if you want it to harden.  Start with a square of black and use two toothpicks to make indentions on each side.


Roll out an oval shape for the sheep's body.


Using a wilton tip 10 make circle marks on the wooly body.


Glue the body onto the legs with gum glue (a little tylose powder mixed with water).  Shape a tear drop for the head.


Pinch out the sides of the head to make ears.  If your fondant is wanting to dry out rub it with some crisco. 


I almost forgot to show the tail (as usual!).  The tail is another small tear drop shape.  Glue both the head and tail to the body as shown.


Use a food marker to draw on the eyes.  It's easier to write with food markers when your fondant is dry.  You could also use small black sprinkles or two tiny balls of black fondant for eyes. 


My sheep heads wanted to fall off so I let them dry with their heads propped up on a little box.  It worked perfect and I got them finished fast. 


Have fun!

Saturday, November 20, 2010

How to Make a Fondant Elephant

Hi guys! I've been working on the cutest cake this week with elephant toppers and thought I'd share how I made them. They turned out adorable. Here's how I did it:


First color your fondant (I use Americolor gel).  Knead in a little tylose powder to help it dry.  Then roll out a tear drop shape for the body and insert a toothpick for stability.  Roll out a log shape for the legs, cut them to the proper size with an exacto knife and glue them to the body using gum glue (a mixture of tylose powder and water).  Using a piping tip make little knee marks on her legs. 


For her head roll out a ball of fondant and pinch and pull it to form the nose.  If the face is sticky dip your fingers in powdered sugar so they don't stick to the fondant.  After you get a good nose shape, use a piping tip to mark a smile. Glue the head onto the body with gum glue.  Using a toothpick give the elephant nostrils and little lines on the top of her nose.


For her ears roll out blue and white fondant and using a wilton tip 10 cut out dots and glue onto the white fondant.  Next use two different size circle cutters and glue the circles together.  Trim off the edge with an exacto knife.  Scrunch up the trimmed side and you are ready to glue to the head.


Using the end of a paintbrush mark holes for the eyes.  Roll out the whites for the eyes and tiny black pupils.  Glue on with gum glue. To make the eyelashes roll out a skinny piece of black fondant and cut to size.  Glue down.


To make the toes cut out dots by using a wilton tip 10.  Cut the dots in half and glue to the elephants feet.  For the tail roll out a skinny log shape and give it a white tip. 


So easy, right?  Hope you have as much fun as I did! 


Tuesday, October 12, 2010

How to Make a Fondant Monkey

Since I havent posted in a while I thought I would make it up to my readers with a monkey tutorial.  The monkey is by far my most requested fondant animal to put on a cake.  Here's how I make the little rascal. 


Color your fondant two shades of brown - one light, one dark.  I used americolor gels and FondX brand fondant.  I also like to knead in a little tylose powder to my fondant to help it dry.  Shape fondant into a tear drop for the body and a round ball for the head.  Insert a toothpick to help keep it in place.


Affix the head onto the body with gum glue (I use a mixture of tylose powder and water).  Roll out a small piece of the lighter brown fondant and cut out a flower shape using a wilton flower cutter.  Remove 3 of the flower petals so you get the eye shape of the monkey.  Form the mouth/nose by making a moon shape out of the lighter brown fondant.  


 Glue down the face pieces with gum glue.


Using the end of a small paint brush and plastic stick create the mouth and nose holes. 


Using the end of your paintbrush mark two spots for her eyes.  Roll out two tiny white balls and glue into the spots.  Also add a tiny black dot for the pupil. 


Make two ear holes and shape two little tear drops for the ears.


Using the end of a paint brush hollow out the ears.


Roll out a thin piece of the lighter brown fondant and use a larger flower cutter (wilton brand) to create the belly of the monkey and glue into place.  I also added a little wisp of hair.


Roll out 4 sasuage shapes to create 2 arms and 2 legs.  I like to use my exacto knife to cut out fingers and toes.  Glue arms and legs onto her body.  And don't forget her long curly tail like I did!  :)


Voila!  She's a cutie!


Thursday, August 20, 2009

How to make a sitting Spongebob Cake

Since my son watches me make cake after cake for other little children, he was so very excited when it was his turn to pick a cake and enjoy it all for himself. He decided on a Spongebob cake and it HAD to have a crabby patty. I was more than happy to make it for him!


Here's how I did it -
I started by baking two 10 inch square cakes. I cut them in half and torted the layers.


I stacked the cakes and filled them with fudge and mint chip buttercream.
I cut my dowels to the proper height and inserted them into the cake.
On another cardboard, I repeated my stacking and fillings with my other 10" cake.
With a sharp knife, I cut down my cardboards to the same size as the cakes. I then stacked the cakes on top of each other.

I then carved the cakes to look like Spongebob by tapering the bottom section. Next, I covered him in buttercream and put him in the refrigerator to chill (about 30 mins).

Next, I used my melon baller to create Spongebob's bumpy edges.  And who's going to know if you pop those extra little bites into your mouth.  :)

I then pushed a sharpened wooden dowel through the middle of both cakes until it was no longer sticking out of the top.  *If you are traveling with this cake be sure to push this center dowell all the way into a cake drum. (I use another dowell to help push it all the way through the drum.)


Next, was my favorite part - the decorating! I started by trimming the excess cardboard with an exacto knife and covered Spongebob in panels of fondant. After draping the fondant on the cake, I cut it to the perfect size with my exacto knife. Repeating on all sides. I used my ribbon cutter to make his pants and shirt out of fondant.


Using the end of my rolling pin, I pushed dents into Spongebob's body. I used round cutters for eyes and a clay gun make the edges. His mouth, feet and legs were all cut and formed by hand out of fondant. I rolled a log shaped piece of yellow fondant and inserted a skewer for his nose. I also used skewers to hold his arms in place. The crabby patty and other decorations on the board were hand modelled out of fondant.

Here is my handsome 4 year old son and his Spongebob cake. He's my sweetie!!